Serato Studio works with a range of popular Serato DJ hardware from Pioneer, Roland, Numark and other companies so you can switch effortlessly between DJing and music production. You can also use Serato Studio with MIDI keyboards and drum pads.
In this blog we’ll touch on everything you need to know so you can get busy making beats with your DJ hardware in Serato Studio.
What DJ Hardware is supported?
For the Serato Studio beta, there will be over 20+ supported devices that you can use. The functions will differ between them, depending on what buttons/knobs they have.
If you own one of these SDJ controllers we’d love to hear your feedback - let us know how it’s working for you and what other software functions you would like to control with it. Just drop us a comment in the beta forum.
Serato DJ Hardware Support in the Serato Studio Beta:
- Pioneer DDJ-SB
- Pioneer DDJ-SB2
- Pioneer DDJ-SB3
- Pioneer DDJ-SZ
- Pioneer DDJ-SZ2
- Pioneer DDJ-SX
- Pioneer DDJ-SX2
- Pioneer DDJ-SX3
- Pioneer DDJ-SR
- Pioneer DDJ-SR2
- Pioneer DDJ-SP1
- Pioneer DJM-S9
- Roland DJ-202
- Roland DJ-505
- Roland DJ-808
- Numark Mixtrack Platinum
- Numark Mixtrack Pro 2
- Numark Mixtrack Pro 3
- Numark Party Mix
- Numark NV
- Numark NV2
- Numark NS6II
- Denon DJ MCX8000
Is your SDJ hardware not on the list?
If your SDJ hardware is not on the list and you want to use it with Serato Studio, then let us know in the Studio Public Beta area.
Hardware Mappings and Controls
This is only a brief overview of how your controller will be mapped to Serato Studio.
(PLEASE NOTE: buttons and controls will differ depending on your hardware layout)
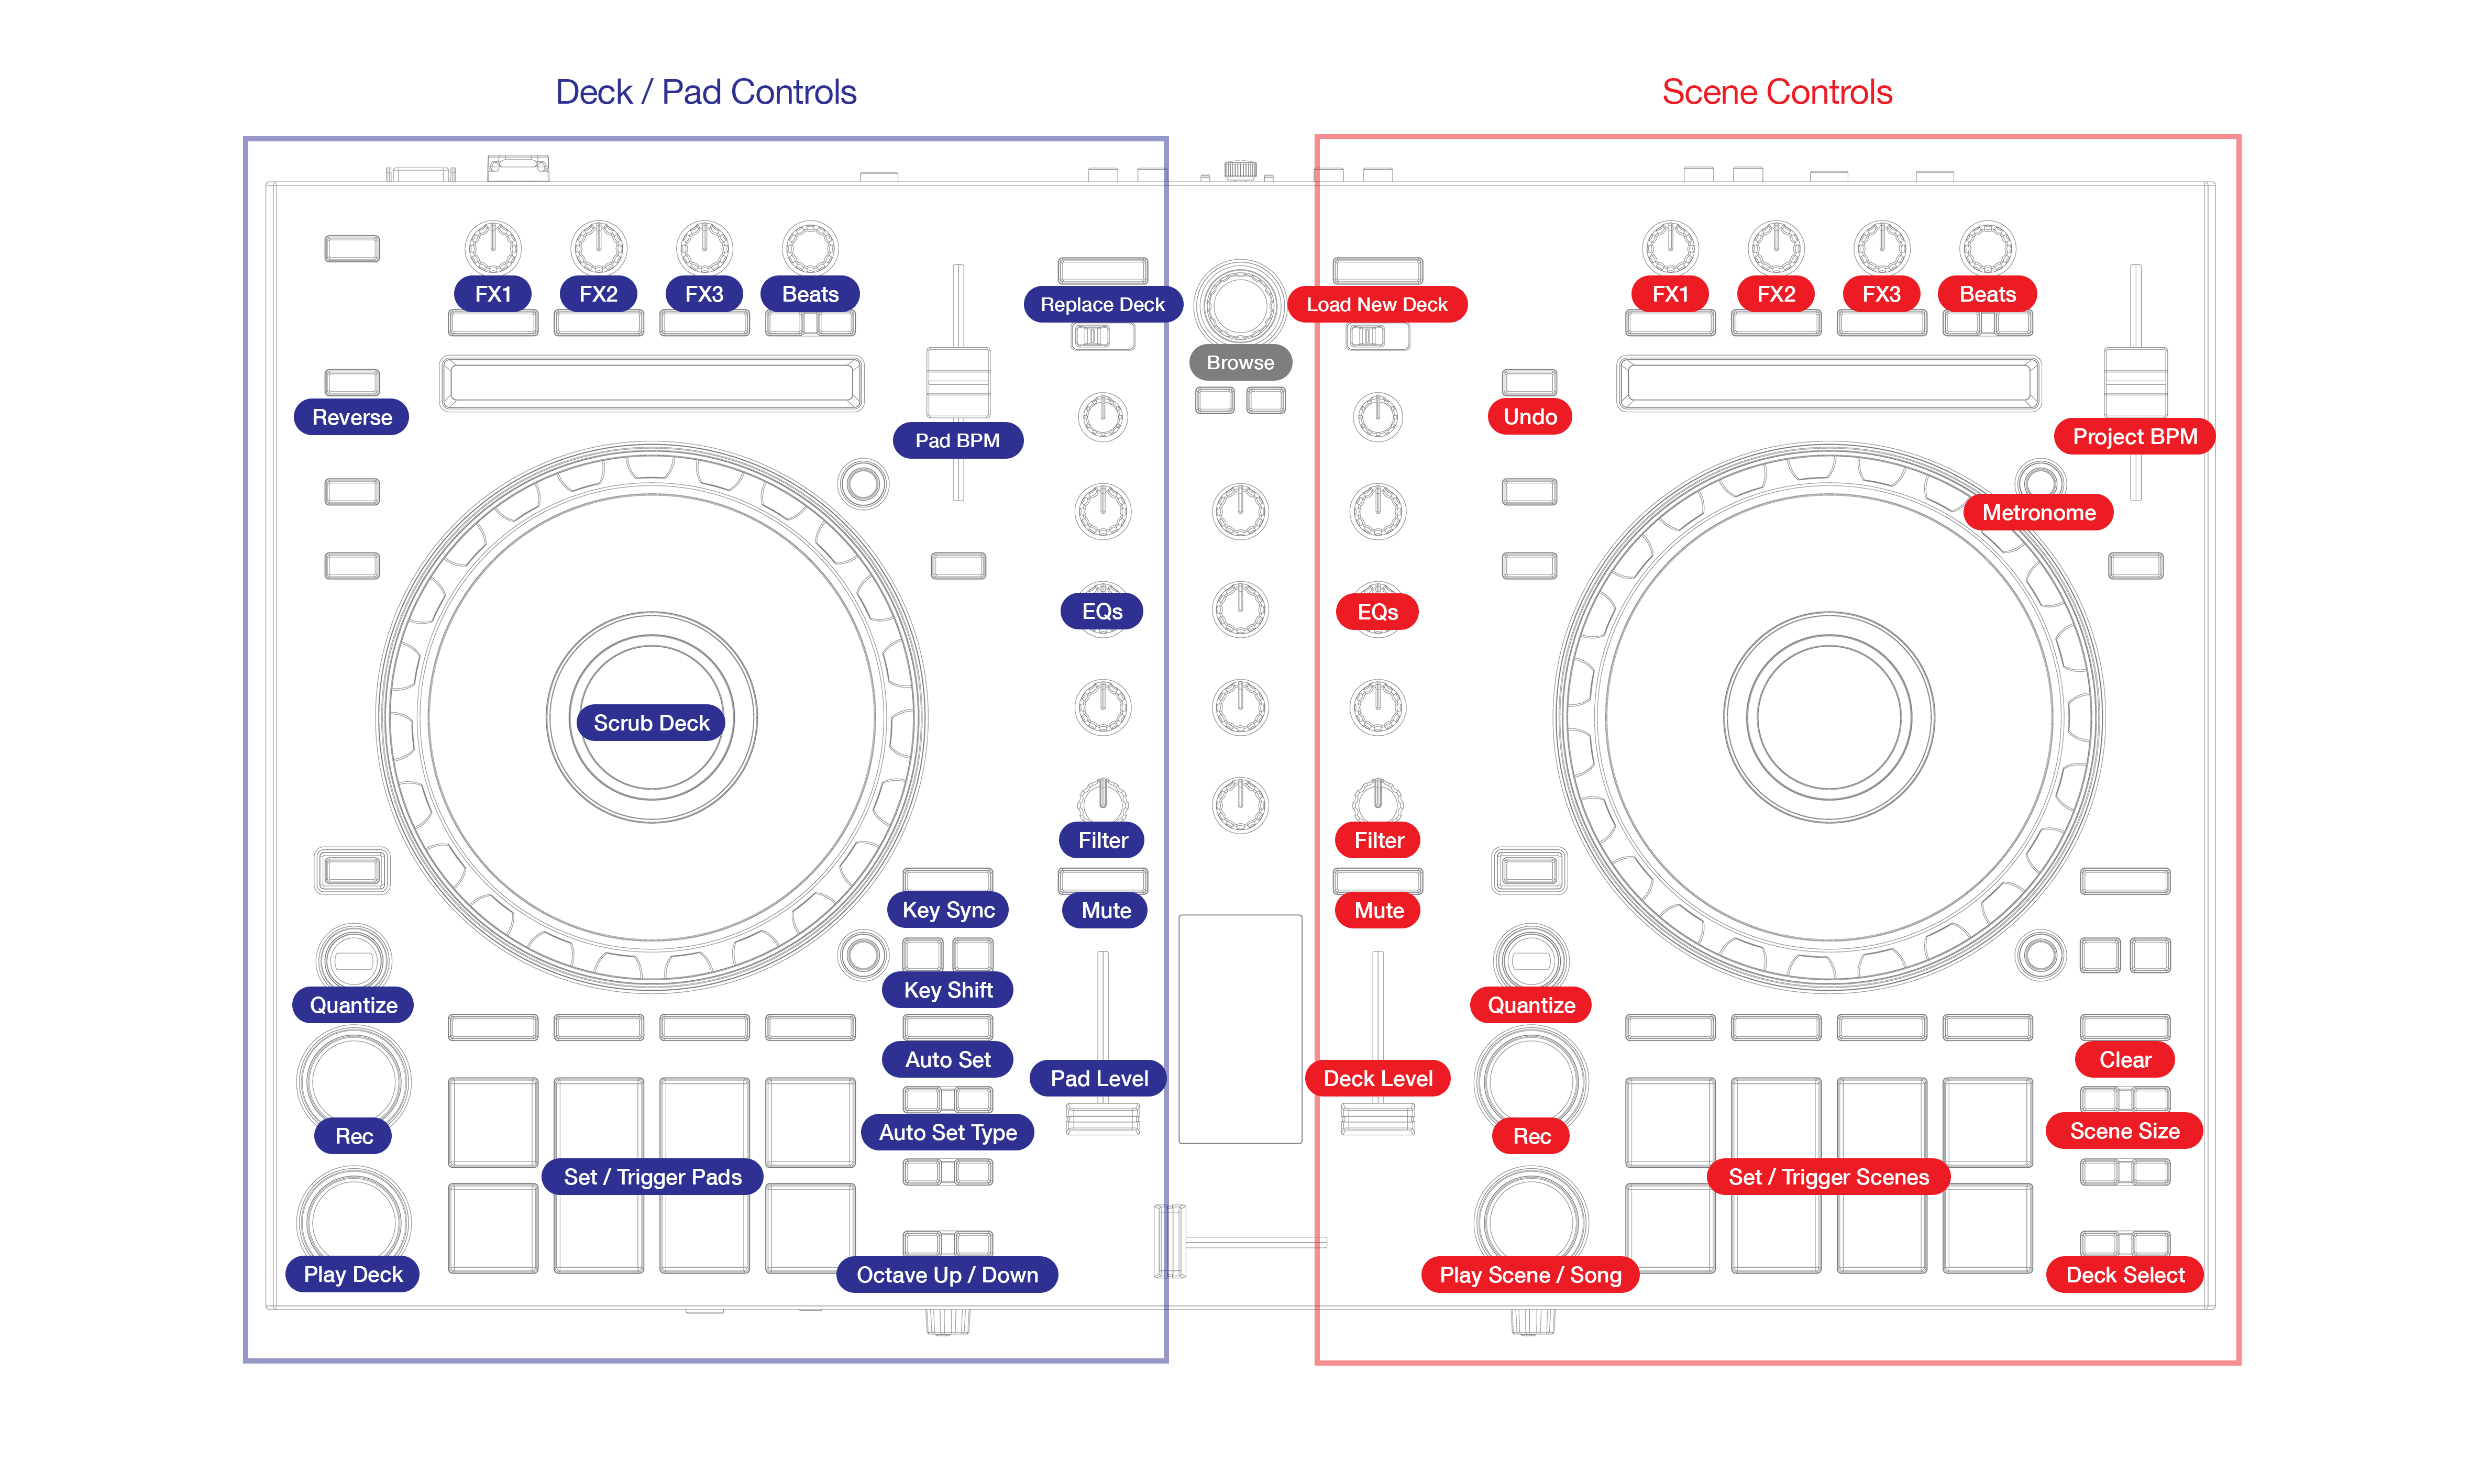
The DJ hardware supported in Serato Studio will have basic mappings to control a number of core functions within the software.
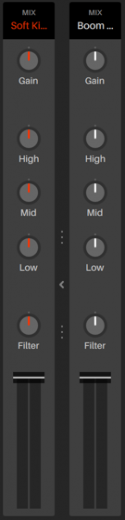
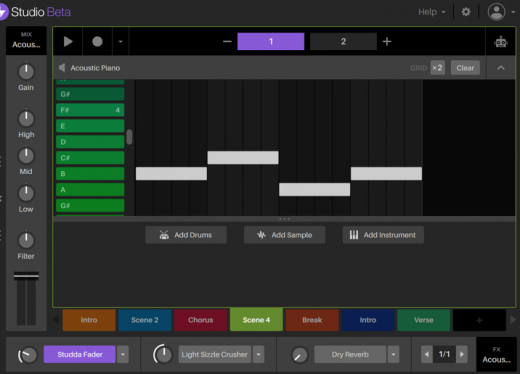
This includes the essentials such as your DJ hardware Mixer and FX Panels, which will allow you to incorporate DJ-style mixing with the dedicated Gain, EQ and Filter knobs, as well as shaping your sounds with the built in FX via the FX controls on the hardware.
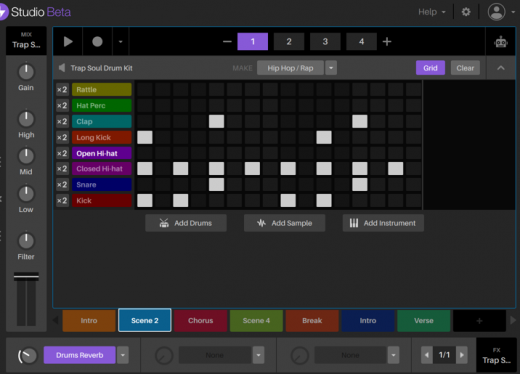
Mixer Panel
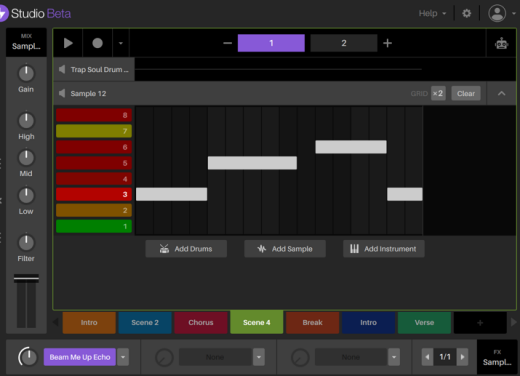
Alongside this, you can use any supported controller or mixer with pads to trigger the cue points of samples in the sample deck, or use them to record in a drum pattern in the drum sequencer.
Your supported DJ hardware is also mapped to control the three main areas of the program. Which are:
-
Drum Deck and Sequencer
-
Sample Deck and Sequencer
-
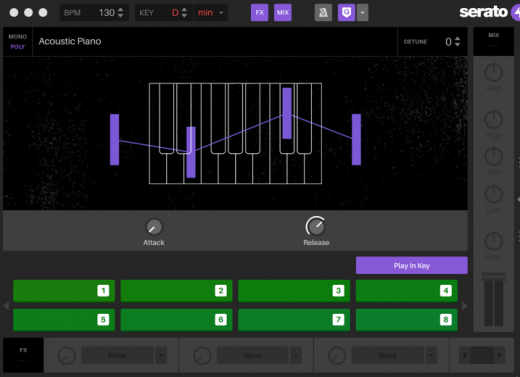
Instrument Deck and Sequencer
For example:
The left side of your controller/mixer will control the features on left-hand side inside Studio. This area is the Deck View.
The Deck View is the entire view of a Deck on the left hand side of the mixer panel. There are three types of Deck you can add;
1. Drum Deck

2. Sample Deck
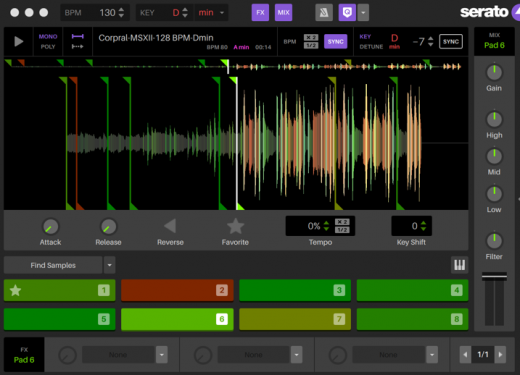
3. Instrument Deck
The right side of your supported controller/mixer will control the features on the right-hand side inside Studio.
This area is called the Scene Player and Sequencer.
Like the Deck View, the Scene Player and Sequencer is where you can create scenes and sequences for the three corresponding decks.
1. Drum Sequences
2. Sample Sequences
3. Instrument Sequences
When you are working in the Song View and arranging your song, the right hand side of the controller will control playback of the Song View.
Song View

Using MIDI Hardware
Serato Studio will also work with your generic MIDI hardware. Simply plug it in like normal to use it.
Serato Studio does not yet have custom mappings for MIDI hardware, the hardware will just work on a case by case basis depending on what MIDI messages are sent. For the most part this will mean it can trigger the pads and piano roll.
We would like to support MIDI hardware more comprehensively in the future.